Creating a visually appealing boundary for your home doesn’t have to cost a fortune or require extensive professional help, especially when installing a white Vinyl Fence. At Savannah Gate & Fence, we understand that homeowners in Savannah, GA, and nearby areas want straightforward solutions that empower them to improve their outdoor spaces. This guide will equip you with the knowledge and confidence to tackle the task yourself, ensuring a beautiful and durable fence without unnecessary hassle. Ready to dive in? Let’s start your DIY journey!
Contents
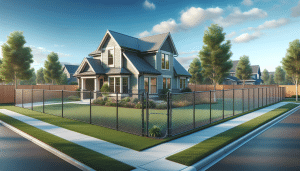
Why Choose White Vinyl Fencing?
White vinyl fencing has surged in popularity due to its charming aesthetics and low maintenance requirements. If you’re wondering what makes this type of fence a great choice for your property, let’s dive into some compelling reasons.
First and foremost, white vinyl fences provide a timeless look that complements almost any home style. Whether your home is a modern masterpiece or a classic gem, this fence can be the perfect finishing touch. Moreover, the crisp white color adds an element of brightness and elegance to your yard.
Additionally, vinyl fences are known for their durability and resistance to the elements. Unlike wood, they don’t rot, warp, or suffer from pest damage, making them an investment that stands the test of time. So, once you install it, you can enjoy its beauty with minimal upkeep for years to come.
Gathering Your Tools and Materials
Before you jump into installing your fence, it’s crucial to have all the necessary tools and materials at your fingertips. Being prepared means a smoother, more enjoyable installation process.
Start with a measuring tape, level, and a post-hole digger, which are essential for ensuring precision and accuracy in your project. A power drill and saw will come in handy for adjusting fence panels and securing them in place. Don’t forget a mallet for tapping components into alignment and protective gear to keep you safe during the installation.
When it comes to materials, you’ll need the vinyl fence panels, posts, fence post caps, and anchors. Additionally, stock up on gravel and concrete for setting the posts and ensuring long-term stability. Once you have these sorted, you’re ready to roll up your sleeves and get started!
Planning Your Fence Layout
Proper planning is the backbone of any successful DIY project. Mapping out your fence layout is crucial to prevent potential headaches down the line.
Begin by measuring the perimeter of the area you want to fence in, taking careful note of property lines and any specific features you need to work around, like trees or existing structures. Using stakes and string, outline the intended path to visualize your layout clearly.
Next, determine the spacing of your fence posts, typically around 6 to 8 feet apart, and mark each position with a stake. This step ensures that your fence panels will fit perfectly between posts and helps you calculate the total number of panels and posts you’ll need.
Digging Post Holes
Once your layout is set, it’s time to roll up your sleeves and start digging those post holes. The key here is ensuring accuracy and depth.
Utilizing your post-hole digger, create holes approximately 24 inches deep and three times the width of your fence posts. This depth provides enough support to withstand wind and other forces. As you dig, periodically check that the holes are uniform in depth and leveled to maintain consistent post height.
After your holes are complete, add a few inches of gravel at the bottom for drainage. This small detail makes a big difference in safeguarding the base of your posts against water accumulation and potential damage.
Setting the Fence Posts
With your holes ready, the next step involves the crucial process of setting the fence posts in place.
Begin by positioning each post in its respective hole, ensuring they’re perfectly upright using a level. Pour in concrete mix around the post, filling the hole to ground level. As the concrete sets, regularly check and adjust the post to maintain vertical alignment.
Allow the concrete to cure for at least 24 to 48 hours, providing a solid foundation. Taking the time now means you can avoid unwanted shifts and unevenness later in your project.
Attaching the Fence Panels
With your posts set in solid ground, it’s time to attach the fence panels, which is arguably the most exciting part of the process!
Align the panels between the posts, starting from one end and proceeding sequentially. Use your power drill to secure each panel with screws, checking with a level to ensure each section remains aligned and uniform.
Take a moment to step back occasionally and assess the overall look as the fence takes shape, making any necessary adjustments before fully securing all panels.
Installing the Gate
A fence functions not only as a boundary but also as a passage, so installing a gate is the next step on your DIY journey.
Carefully measure the width for your gate, matching it with the provided gate kit dimensions. Align the gate frame with the posts and attach the hinges according to the manufacturer’s instructions, ensuring smooth swing action.
Finally, attach the latch for security. Test your gate’s operation to confirm its ease of use and adjustments, if needed, for smooth functionality.
Finishing Touches
Now that your white vinyl fence is standing tall, don’t forget the essential finishing touches to complete your project.
Crown each post with a post cap, adding that polished look. These caps not only enhance the aesthetic but also help keep water out of the post, preventing internal damage over time.
If desired, you can further customize your fence with decorative elements or paint, remembering that these additions should suit the vinyl material. Celebrate your hard work and marvel at the transformation brought to your yard space!
Maintenance Tips for Your Vinyl Fence
Once installed, maintaining your vinyl fence in pristine condition is a breeze, with just a few simple steps.
- Regular Cleaning: Clean your vinyl fence with a garden hose to remove dirt and debris. For stubborn spots, use a soft brush and mild soap solution.
- Inspect for Damage: Periodically inspect your fence for cracks or any loose panels, addressing any issues promptly to maintain its integrity.
- Avoid Harsh Chemicals: Steer clear of using harsh chemicals or abrasive materials for cleaning, as this can damage the vinyl surface.
- Trim Vegetation: Keep plants and bushes trimmed away from your fence to reduce moisture and mildew growth, prolonging its lifespan.
- Solve Drainage Issues: Ensure proper drainage around the fence to prevent water pooling, which can affect the post stability over time.
Conclusion
With this DIY guide in hand, you’re fully equipped to install a beautiful white vinyl fence that transforms your outdoor space with style and functionality. For any clarifications or professional assistance, connect with us by phone at 912-800-0818 or Request a Free Quote.