Thinking about a new fence for your yard in Savannah? A well-built Chain Link fence might be exactly what you need—practical, sturdy, budget-friendly, and quick to set up. It keeps kids and pets safe, defines your space, and, with the right finish, looks clean and neat. And yes, it can be more attractive than you remember. As a local team at Savannah Gate & Fence, we install a lot of them, so we put together this step-by-step guide to help homeowners understand the process, avoid common pitfalls, and decide whether to DIY or let us handle it. You know what? Either way, you’ll end up with a fence that works hard for your home.
Contents
- 1 Why a chain link fence makes sense in Savannah
- 2 Materials and styles that work here
- 3 Tools and supplies you’ll need
- 4 Permits, property lines, and utilities: the not-so-glamorous must-do’s
- 5 Step-by-step: residential chain link fence installation
- 5.1 1) Plan the layout and measure
- 5.2 2) Mark and set your post holes
- 5.3 3) Set terminal posts first
- 5.4 4) Install line posts
- 5.5 5) Add hardware and top rail
- 5.6 6) Attach the chain link fabric to the first terminal
- 5.7 7) Pull the fabric tight
- 5.8 8) Tie the fabric to posts and rail
- 5.9 9) Add tension wire or a bottom rail
- 5.10 10) Install the gate
- 6 Gate setup: small parts, big difference
- 7 Local tips for Savannah’s climate and soil
- 8 Common mistakes to avoid
- 9 Cost, timeline, and what to expect
- 10 Maintenance and smart upgrades
- 11 DIY or professional install—how to choose
- 12 A quick walkthrough example
- 13 Ready when you are: Savannah Gate & Fence
Why a chain link fence makes sense in Savannah
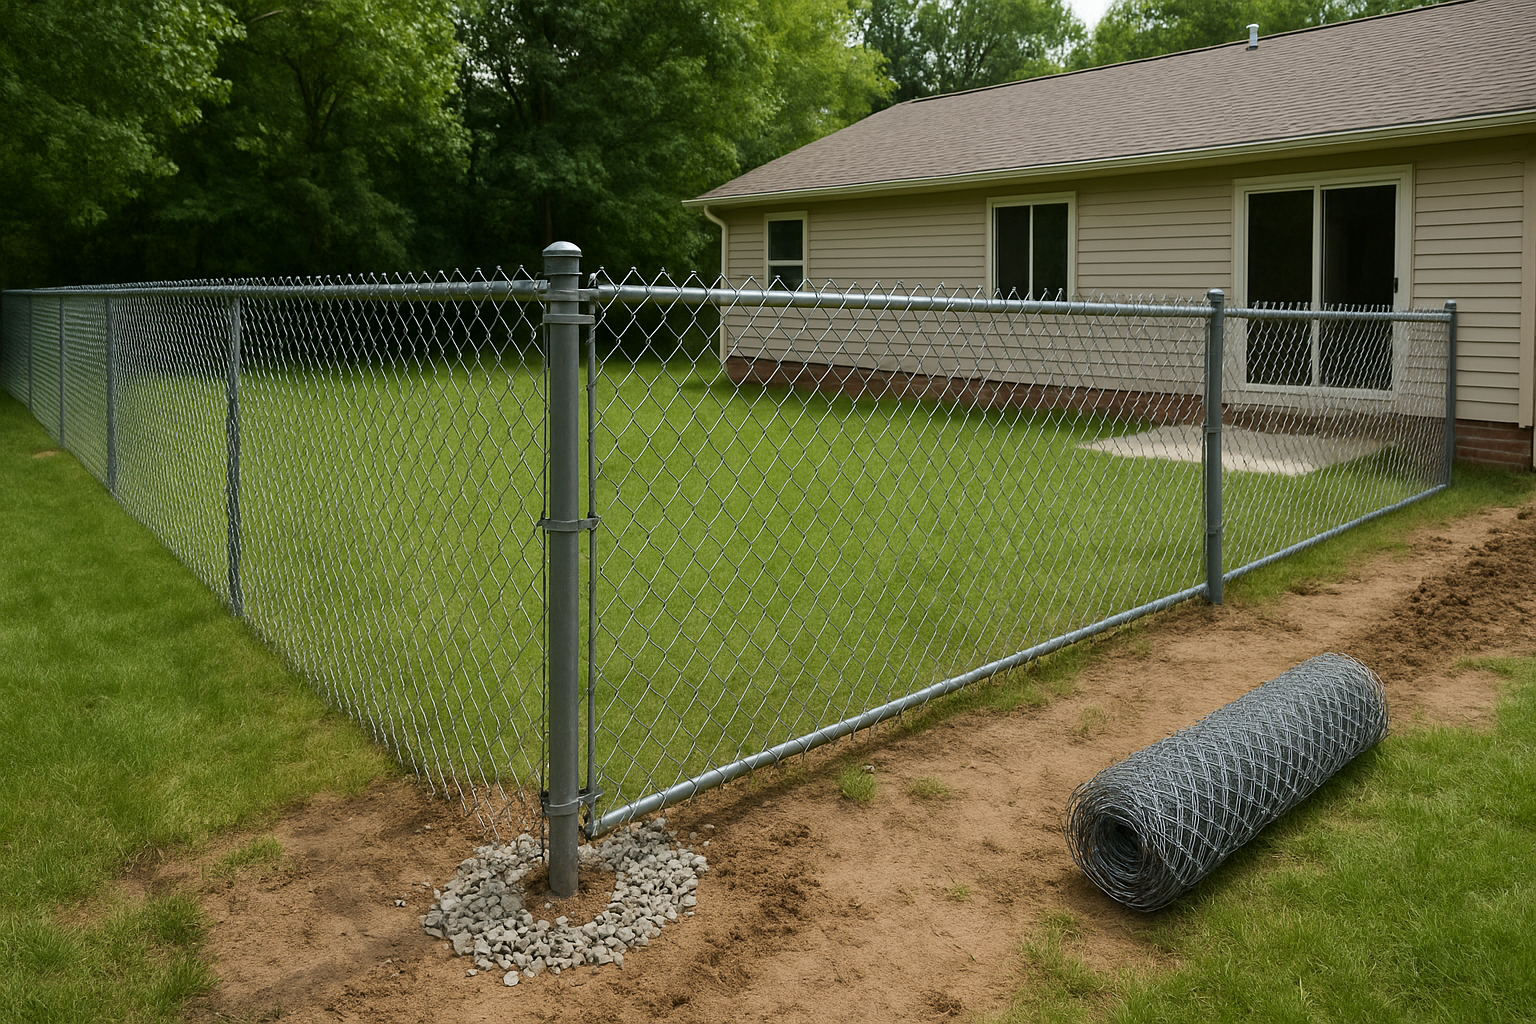
Let’s start with the obvious: chain link fence installation is one of the fastest ways to secure a yard. It’s tough enough for everyday wear, dogs, and the occasional backyard soccer game. It also holds up well in our coastal climate—if you choose the right materials. In Savannah, humidity, salt in the air, and summer storms can be rough on metal. That’s why we like galvanized or vinyl-coated systems. They resist rust and keep their shape when the wind picks up.
Some folks worry about privacy. Fair point. A chain link fence is see-through—until it isn’t. You can add privacy slats, mesh screens, or even grow jasmine or confederate rose along the fence line for a softer look. It becomes a frame for your garden rather than the star of the show.
Honestly, the best part is the balance of cost and performance. You get safety, visibility, and very low upkeep at a price that makes sense. It’s not fancy. It’s reliable. And for a lot of homeowners, that’s the goal.
Materials and styles that work here
Not all chain link is the same. The finish and wire gauge matter—especially near the coast. Here’s a quick look at popular choices we install around Savannah, GA neighborhoods:
| Finish | Look | Durability & Care |
|---|---|---|
| Galvanized | Classic silver | Strong, budget-friendly; rinse after storms to reduce salt buildup |
| Black vinyl-coated | Sleek, blends with landscaping | Great corrosion resistance; quiets rattling slightly |
| Green vinyl-coated | Garden-friendly, low visual impact | Similar to black coating; ideal near tree lines |
For height, Residential fences are often 4 to 6 feet. Four feet keeps the front tidy and within many HOA rules. Six feet gives a bit more security out back. If you have a pool, check local code for height and self-closing gate requirements.
Tools and supplies you’ll need
Gather your tools first, and the job goes smoother. This is one of those projects where a missing piece can slow you down. Here’s the short list our crews keep handy:
- Measuring tape and stakes for layout and post spacing
- String line and marker paint to keep runs straight
- Post hole digger or auger for faster, consistent holes
- Level and speed square for plumb posts and aligned rails
- Concrete mix like Quikrete Fast-Setting (or standard mix)
- Wrenches, pliers, and tin snips for hardware and fabric
- Fence puller or come‑along to tension the fabric properly
- Tension bars, bands, and carriage bolts for terminal posts
- Top rail (1-3/8 in.) and line posts (1-5/8 in. or 2 in.)
- Terminal/corner posts (heavier; 2-1/2 in. or larger)
- Chain link fabric matched to height and finish
- Tension wire or bottom rail to keep the bottom tight
- Gate kit with hinges, latch, and posts sized for the gate
If you’re buying retail, look at brands like Master Halco or Merchants Metals for pro-grade materials. Big-box stores carry solid options too, but check the gauge—thicker wire and heavier posts usually last longer.
Permits, property lines, and utilities: the not-so-glamorous must-do’s
Here’s the thing: the prep you can’t see matters. Most residential chain link installs in the City of Savannah and Chatham County are straightforward, but tall fences and corner lots may have extra rules. Always confirm setbacks with the city or your HOA.
Call 811 before you dig—utilities will mark gas, water, and cable lines. It’s free and can save a serious headache. Also, double-check your property survey so you don’t build a fence on a neighbor’s side. It happens more than you’d think, and it’s never a fun conversation later.
Step-by-step: residential chain link fence installation
1) Plan the layout and measure
Sketch your fence line. Mark corners and gate openings. Measure runs and count how many posts you’ll need, spacing line posts at about 8 to 10 feet. More wind exposure? Go closer. For Gates, allow extra room for hinges and latch hardware, plus a little clearance for uneven ground.
2) Mark and set your post holes
Use string lines to define the run. Mark terminal post holes at corners, ends, and both sides of each gate. Then mark line post holes between them. In Savannah, you’re not fighting deep frost, but you still want solid footings. As a rule, dig holes that are about three times the post width and at least 24 to 30 inches deep. Sandy soil or low spots? Go deeper and bell out the bottom for stability.
3) Set terminal posts first
Terminal posts take the load, so they go in first. Mix your concrete to a thick consistency—think peanut butter more than soup. Set each post plumb and to height, with the tops aligning along the string. Crown the concrete slightly so rain sheds away from the post. Let it set. If you use fast-setting mix, you can keep moving sooner, but standard mix cures stronger. Mild contradiction, right? It is—speed is nice, but strength lasts. Choose based on your schedule and soil.
4) Install line posts
Cut a spacer board to keep post height consistent. Set each line post plumb and aligned with the string. Check, recheck, and then leave them alone while the concrete cures. A wobbly post now becomes a crooked fence later. In our humid summers, we like to give posts a solid 24 hours to set before pulling fabric, even with fast-set mixes.
5) Add hardware and top rail
Slide tension bands and caps onto the terminal posts before the concrete fully hardens. Add loop caps to line posts, then run the top rail through the loops. Secure joints with couplers. The top rail ties everything together and keeps the fence straight under tension.
6) Attach the chain link fabric to the first terminal
Stand the roll of fabric upright and unwind it along the line. Hook a tension bar through the first edge of the fabric and bolt it to the tension bands on your first terminal post. Keep the bottom of the fabric about one to two inches above grade unless you’re installing a bottom rail or tension wire.
7) Pull the fabric tight
This is where the magic happens. Use a fence puller or come‑along with a stretcher bar to tension the mesh toward the far terminal post. Pull until the diamonds look even and the fabric feels firm—like a drum, but not so tight that you deform the mesh. Slide in another tension bar on the far end and bolt it to the terminal bands.
8) Tie the fabric to posts and rail
Clip the fabric to the top rail and each line post using wire ties or aluminum clips every 12 to 24 inches along the rail and at least three ties per line post. It’s tedious, but it’s what keeps the fence neat and quiet in the wind.
9) Add tension wire or a bottom rail
For pets that like to dig—or if you’re in a breezy spot—run a bottom tension wire through hog rings attached to the fabric. A bottom rail offers more support but adds cost and time. Around coastal areas and open lots, we often recommend it.
10) Install the gate
Set gate posts heavier and deeper than line posts. Hang the gate with the top hinge pin facing down and the bottom pin facing up—this prevents lift-out. Adjust the latch so it’s easy to close with one hand. If it’s a pool gate, use a self-closing hinge and code-approved latch height.
Step back, sight your lines, and make final tweaks. A straight, quiet fence with a smooth-closing gate is the goal. When it looks good from your porch, it’s usually right.
Gate setup: small parts, big difference
Gates cause most of the headaches we see on DIY jobs. It’s not your fault—gravity never quits. The fix is in the details: hinge spacing, post depth, gate frame size, and latch placement. We like to set gate posts deeper and use heavier-wall pipe. It’s an extra measure that pays off when a summer storm pushes through.
If the ground slopes, hang the gate so the bottom edge clears your high point. And give yourself a little play in the hinges so you can fine-tune after everything settles. A quiet gate is like a well-oiled door—no one notices it because it just works.
Local tips for Savannah’s climate and soil
Our Lowcountry soil can be sandy near the islands and heavier inland. In sandy areas, widen and bell the base of your footings. In clay, avoid setting posts in a bowl where water can sit—raise the crown and keep water shedding away.
After coastal storms, hose down galvanized and vinyl-coated fences to rinse salt. It sounds simple, because it is. That quick rinse keeps corrosion at bay. And for yards near marshy zones, tension wire at the bottom helps keep the fence snug when the wind kicks up.
Common mistakes to avoid
- Skipping 811 and hitting utilities—always call before digging.
- Too-wide post spacing leading to sagging top rails; stick to 8–10 feet.
- Under-sized terminals at corners and gates; they take the pull, so size them up.
- Pulling fabric unevenly so diamonds distort; tension slowly and check as you go.
- Setting gates last-minute without planning slope and latch height.
One more subtle one: placing the fence right on the ground. It feels secure at first, but moisture and grass clipping buildup shorten the life of the fabric. Leave a small gap or use a bottom rail.
Cost, timeline, and what to expect
We know budget matters. For most residential chain link fence projects in the Savannah area, installed costs often land around $12–$22 per linear foot depending on height, finish, gates, and site conditions. DIY materials will be lower, of course, but plan for tool rentals if you don’t already have them.
Timeline varies. A typical backyard can be set over a weekend: one day for layout and posts, one day for rails, fabric, and the gate. If you pour standard concrete, add cure time before tensioning. When we handle a job, we schedule around weather and soil conditions so the set and pull both happen at the right time.
Maintenance and smart upgrades
Chain link is famously low maintenance. Give it a rinse now and then, clear vines before they thicken, and put a drop of lubricant on gate hinges twice a year. That’s about it. In coastal zones or near busy roads, we sometimes suggest a black vinyl-coated system, which shrugs off corrosion and visually blends into the background.
Want more privacy without building a wall? Add slats or a woven screen rated for wind. And if you’ve got pups with an escape artist streak, tension wire and a bottom rail turn your fence into a fortress without changing the look much.
DIY or professional install—how to choose
Some folks love a weekend project, and this is a good one. If you’re comfortable with layout, digging, and tensioning, you’ll do fine. Just be patient with the pull and the gate. If the yard has hills, roots, or tight spaces next to a neighbor’s fence, it gets tricky fast. That’s when bringing in a local crew pays off.
At Savannah Gate & Fence, we install clean, straight runs, size gate posts right, and handle the small adjustments that make the fence quiet and solid. We also know the local soil and codes, and we work fast without cutting corners—because those corners hold your fence together.
A quick walkthrough example
Here’s a common setup we build in Midtown and Southside neighborhoods: a 5-foot black vinyl-coated chain link fence around a 75-by-100-foot lot, with a 4-foot pedestrian gate on the side yard. We set heavy terminals at corners and the gate, run top rail and bottom tension wire, and add a screen along the back facing an alley. It keeps the yard open, the dogs safe, and the view tidy. Nothing flashy—and the curb appeal is better than you’d think.
Swap in a 6-foot height for more backyard privacy and add slats if you want coverage along one side. It’s like tuning a guitar: small adjustments change the whole feel.
Ready when you are: Savannah Gate & Fence
If you’d rather skip the digging, the measuring, and the gate tweaks, we’re here to help. We install chain link fences in Savannah, GA that stand straight, look clean, and hold up to salt air and summer storms. We’ll walk your property, talk through heights and finishes, and set a schedule that works around your life.
Call Savannah Gate & Fence at 912-800-0818 or tap here to Request a Free Quote. Tell us what you need—pets, privacy, pool safety—and we’ll build a plan that fits your yard and your budget. Straightforward, honest, and done right the first time.