At Savannah Gate & Fence, we understand that installing a Vinyl Fence can seem overwhelming. That’s why we’ve created this comprehensive guide. Whether you’re a DIY enthusiast or considering professional help, this guide will make your Residential vinyl fence installation as smooth as possible.
Contents
- 1 Why Choose a Vinyl Fence?
- 2 Getting Started: Planning Your Vinyl Fence Installation
- 3 Choosing the Right Vinyl Fence Style
- 4 Measuring for Your Vinyl Fence
- 5 Essential Tools and Materials
- 6 Preparing the Fence Posts
- 7 Installing the Fence Panels
- 8 Gate Installation
- 9 Final Touches and Inspection
- 10 Maintaining Your Vinyl Fence
- 11 Do You Need Professional Help?
Why Choose a Vinyl Fence?
Vinyl fences have become increasingly popular among homeowners for several good reasons. Not only are they durable and long-lasting, but they also provide a sleek, modern look that can boost your home’s curb appeal.
Additionally, vinyl fences require minimal maintenance compared to traditional wood fences. With a quick rinse from a garden hose, they look as good as new! If you want a stylish, hassle-free fencing option, vinyl is an excellent choice.
Getting Started: Planning Your Vinyl Fence Installation
Planning is the first crucial step in any successful vinyl fence installation. Begin by determining your property lines to avoid any boundary disputes with your neighbors. Check your local zoning laws and HOA regulations to ensure compliance.
Once you know where to install, sketch a layout of your fence, noting the locations for Gates, corners, and ends. This helps you visualize the project and ensures you purchase the correct amount of materials.
Choosing the Right Vinyl Fence Style
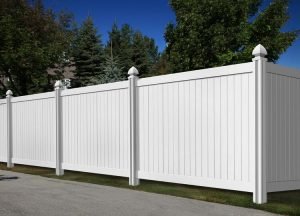
Vinyl fences come in various styles, from privacy fences and picket fences to rail fences. Think about your primary reason for installing a fence. For example, if you want to add privacy to your backyard, a solid panel fence is ideal.
If aesthetics and minimal security are your goals, a picket or rail fence may be more suitable. Selecting the right style ensures your new vinyl fence meets your functional and aesthetic needs.
Measuring for Your Vinyl Fence
Correct measurements are key to a successful fence installation. Start by marking your starting and ending points, corners, and gate locations with stakes. Use a measuring tape to measure the distance between each stake.
Don’t forget to account for any slopes or uneven ground in your measurements. Being precise will help you avoid extra trips to the store and ensure a smooth installation process.
Essential Tools and Materials
Before diving into the installation, gather all necessary tools and materials. This preparation can save you from unnecessary interruptions. Here’s a quick checklist:
- Post Hole Digger: Essential for digging deep, even holes for your fence posts.
- Level: Ensures that your posts and panels are perfectly vertical and aligned.
- Rubber Mallet: Useful for gently tapping fence panels into place without damaging the vinyl.
- Gravel and Concrete: Helps to stabilize and secure your posts in the ground.
- Measuring Tape: Crucial for accurate spacing and alignment of your fence components.
Preparing the Fence Posts
Now that you have everything ready, start by preparing the fence posts. Dig holes for your posts using the post hole digger. The holes should be deep enough to support the fence securely, typically about one-third the height of the post.
Add gravel to the bottom of each hole for drainage and improved stability. Place the posts in the holes and fill them with concrete for added strength. Use a level to ensure each post is perfectly vertical and allow the concrete to set before proceeding.
Installing the Fence Panels
Once the posts are set and secure, you can begin installing the fence panels. Start by attaching the bottom rail between two posts, ensuring it’s level. Next, slide the panels into place, tapping them gently with a rubber mallet if needed.
Secure the panels to the posts with screws or brackets according to the manufacturer’s instructions. Check each section for level and plumb alignment before moving on to the next panel. This step ensures a smooth, even fence line.
Gate Installation
Gates are an essential part of your vinyl fence, providing access while maintaining security. Install the gate posts first, ensuring they are set deeper and more securely than regular fence posts due to the additional stress from opening and closing.
Attach the gate hinges to the posts and the gate panel itself. Make sure the gate panel is level and swings freely before securing it in place with screws. Finally, install the latch or locking mechanism.
Final Touches and Inspection
With your fence and gate installed, take the time to inspect your work. Walk along the fence line and check for any loose panels or posts. Ensure that all screws and brackets are securely fastened.
Make any necessary adjustments to gates, ensuring they open and close smoothly. A thorough inspection will help identify and rectify potential issues before they become problematic.
Maintaining Your Vinyl Fence
One of the best things about vinyl fences is their low maintenance requirements. However, occasional care will keep it looking pristine. Rinse your fence with a garden hose to remove dirt and debris.
For stubborn stains, use a mild detergent and a soft brush. Avoid using abrasive cleaners or tools that could damage the vinyl. Regular maintenance will keep your fence looking new for years to come.
Do You Need Professional Help?
While DIY installation can be rewarding, it’s not for everyone. If you’re short on time or prefer leaving it to the experts, consider hiring a professional. At Savannah Gate & Fence, we specialize in installing vinyl fences efficiently and correctly.
Our team of experienced installers will handle everything from planning and preparation to the final inspection, ensuring you get a high-quality, long-lasting fence without lifting a finger.
For a flawless vinyl fence installation, contact Savannah Gate & Fence today by phone # 912-800-0818 or Request a Free Quote.